The power of your personal brand and the business you are building has much to do with the quality of your LinkedIn profile.
With your profile being non-optimized, you practically don’t exist in the business world.
Most people assume they only need to publish often and be active to have an excellent LinkedIn profile, but is that really so?!
Definitely not.
Many small steps lead you to a well-optimized profile, and as such, it leads you to more business opportunities and faster growth.
This article presents a checklist that can help you easily optimize your LinkedIn profile to attract your target audience's attention.
Let’s begin!
3 Main Reasons To Optimize Your LinkedIn Profile
A well-optimized LinkedIn profile has every section filled out saying who you are, what you do, and what your expertise is, which helps you:
🚀 Boost your visibility in LinkedIn searches, ranking your profile higher when someone searches for your name or profession.
🚀 Enhance trust among individuals who may be interested in connecting or following you.
🚀 Increase your professional reach and enlarge your network by attracting people interested in your content, product, or service.
First Things First - General Settings on LinkedIn
Before we get into the depth of profile optimization, there are three things you need to pay attention to.
Make sure to check your profile settings and technical setups before proceeding with anything else.
1. Check the visibility of your profile
If your profile is not visible on LinkedIn, you are practically anonymous in the online business world.
This is something that you certainly want to avoid at all costs.
In order to connect with people, you need to show who you are.
So, the initial step to do it is to make your profile visible first.
Here’s how to do it in two easy steps:
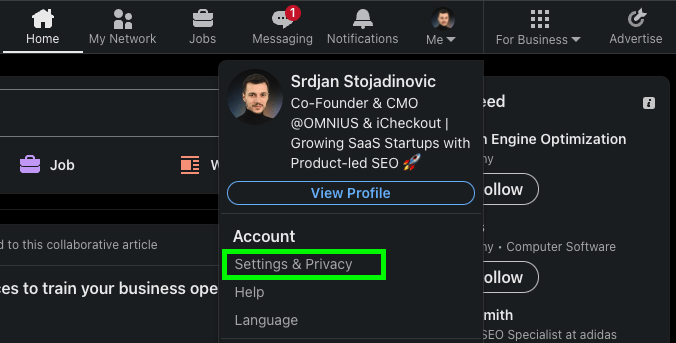
Step 1. Click on your profile photo and go to “Settings and Privacy.”
Step 2. Navigate to the “Visibility” tab and choose “Your name and headline”.
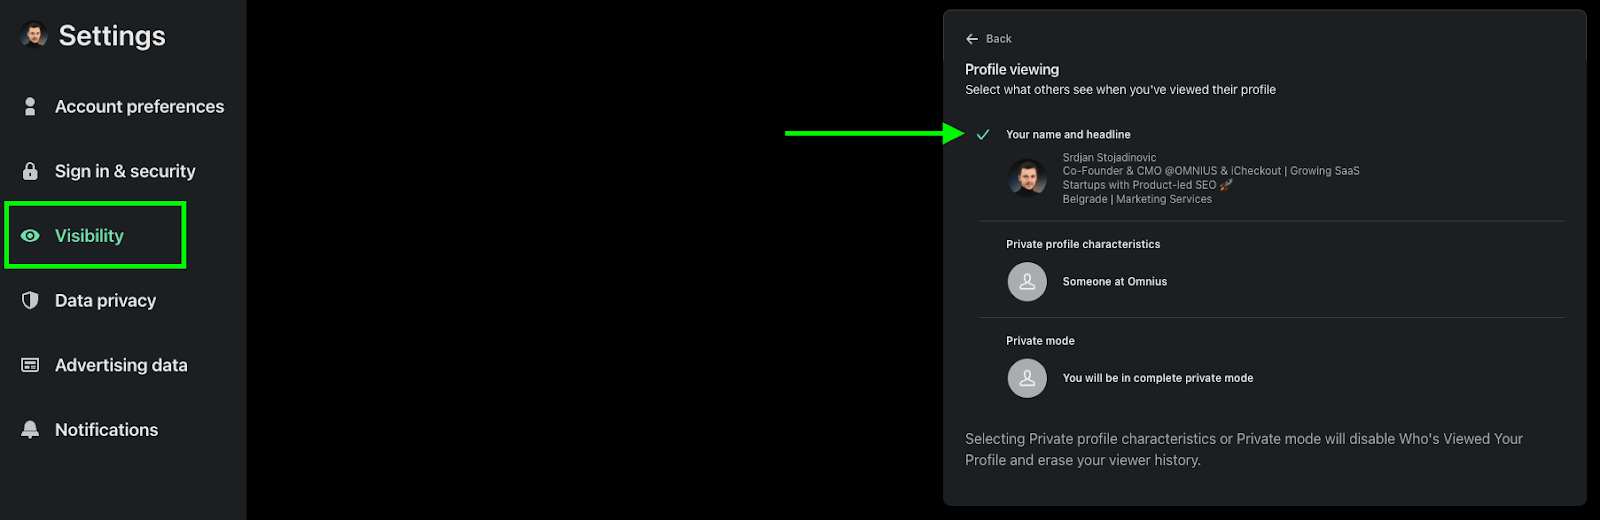
Your profile information is now visible.
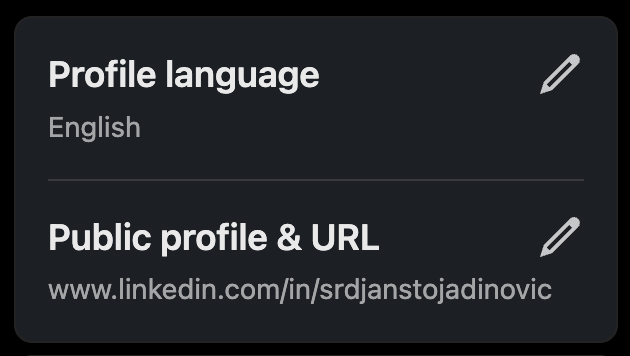
2. Customize your URL
Once you sign up on LinkedIn, the platform will automatically generate a default URL for your profile.
Customizing your public profile URL can enhance your profile visibility and make it easier for users to find and connect with you.
Here’s how to customize your URL easily:
1. First, enter your profile and then click an edit URL icon on the ride side of your LinkedIn profile.
Here are some tips to keep in mind when optimizing your URL:
- Include your full name or a professional variation.
- Keep it simple, memorable, and easy to spell.
- Avoid using nicknames or initials for a more professional appearance.
- Remove any special characters, spaces, or symbols from your URL.
- Adjust your public profile settings to ensure your customized URL is visible to others.
2. Once you customize your URL, hit “Save.”

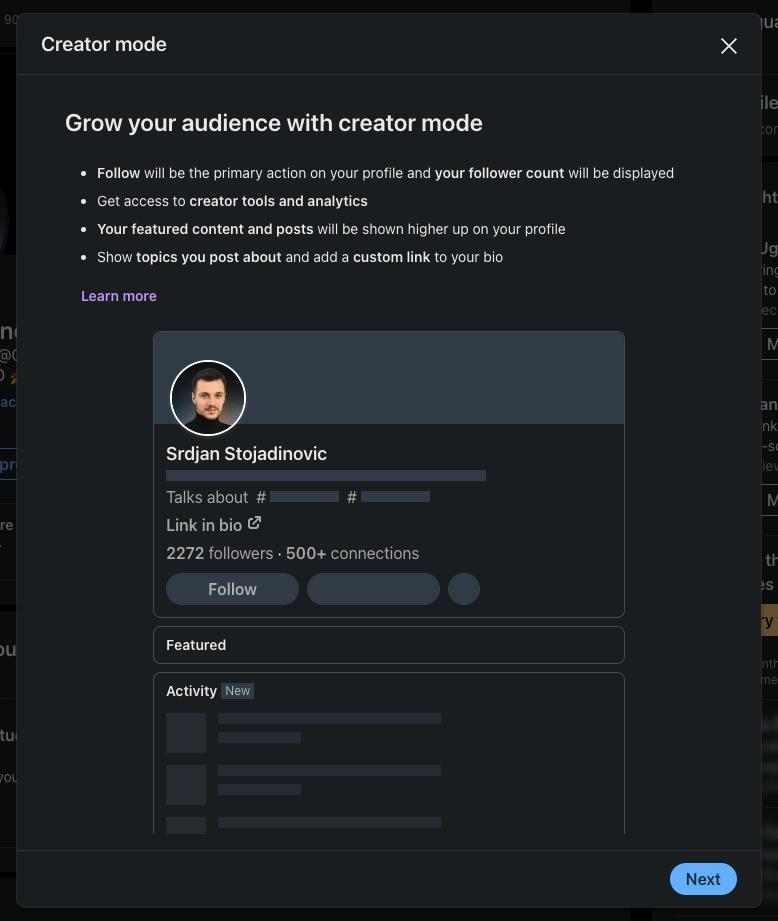
3. Enable LinkedIn Creator Mode
Creator Mode provides users with extra tools and features to create and publish content with the goal of growing their LinkedIn audience.
Once you enable creator mode, your profile will be optimized by LinkedIn, which helps you increase the visibility of your articles and posts and help your visitors understand what you post about.
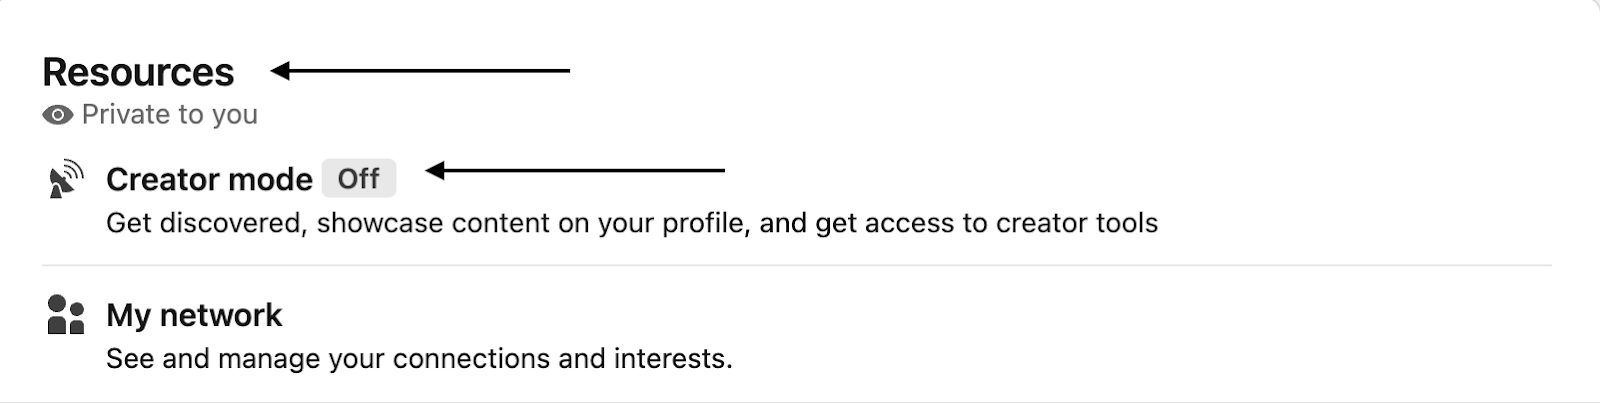
To enable creator mode, enter your profile and scroll down until you see the “Resources” section.
Click on “Creator Mode: Off.”
Once you click on the “Creator Mode: Off” option, follow the next steps shown, include topics you post about the most, and click the “Turn on” button to activate the Creator Mode.
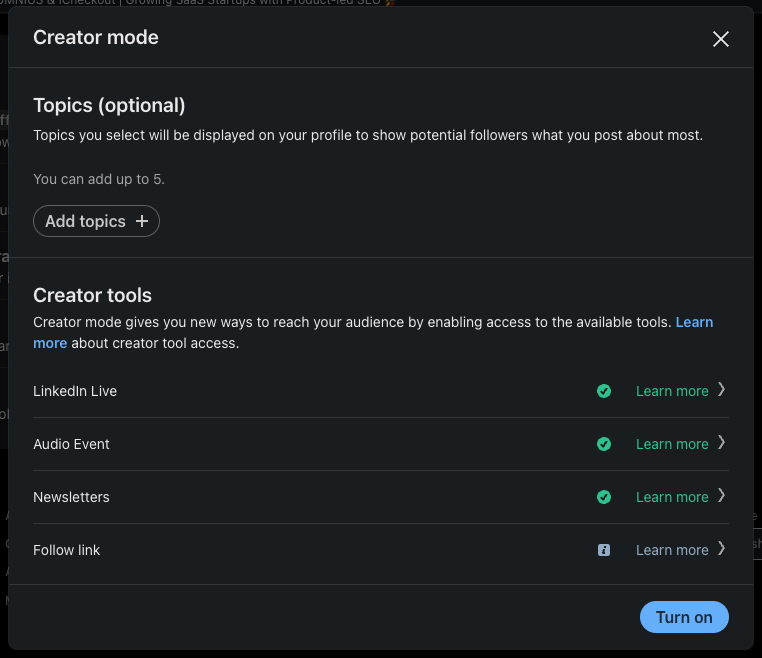
Pro tip: Ensure you have 1 to 3 hashtags that you will use consistently.
Because if you use more of them and talk about everything, people will think you’re the expert in nothing.
So keeping your number of hashtags from 1 to 3 within the Creator mode will help you position yourself as an expert in your niche more easily.
The Only LinkedIn Profile Optimization Checklist You Need
Now that you have checked the first three things, we can move on to the LinkedIn profile optimization checklist.
Step 1: Set the High-Quality Profile Photo
Your profile picture is the first impression of you that users see when they enter your profile.
So, how to make it stand out?
Choose a picture where you are smiling to look more friendly and approachable and attract more people to connect with you.
A good practice is to make sure to fill about 60% of the image space to ensure the picture is clear and visible.
If you are unsure that the picture you chose is right, check this list:
✅ Was this photo captured lately?
✅ Is the photo too dark, or it has natural lighting?
✅ Do I look friendly and approachable?
✅ Am I dressed appropriately?
✅ Is the photo size correct (400px x 400px)?
You can use PFPmaker to create different variations of LinkedIn profile photos adapted to your business in a minute.
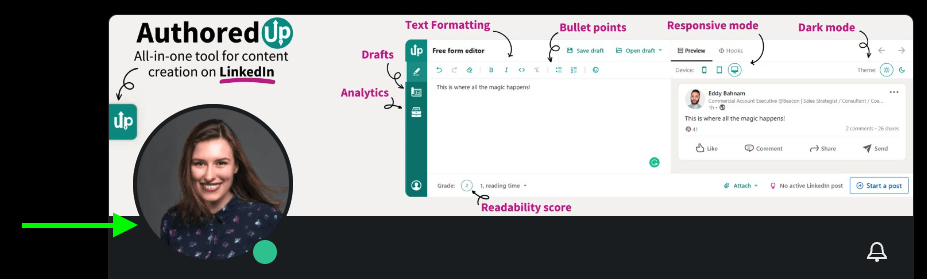
Step 2: Upload The Cover Photo That Represents Your Work
The cover photo occupies the majority of space on your profile and automatically catches the eye of the person viewing your profile.
To make your cover photo attractive, make sure to use a photo of your product, team, or brand logo.
Note: Avoid using any stock photos since those images don’t carry any meaning. Those images just drive the visitors away and make you look generic and boring.
Here is the checklist to follow when creating your LinkedIn cover photo:
✅ Does the picture clarify what I do?
✅ Is it mobile-friendly?
✅ Is the image size correct (1584×396 pixels)?
✅ Did I use my brand colors?
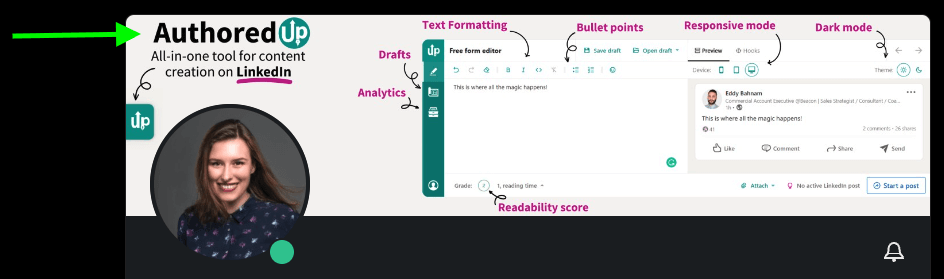
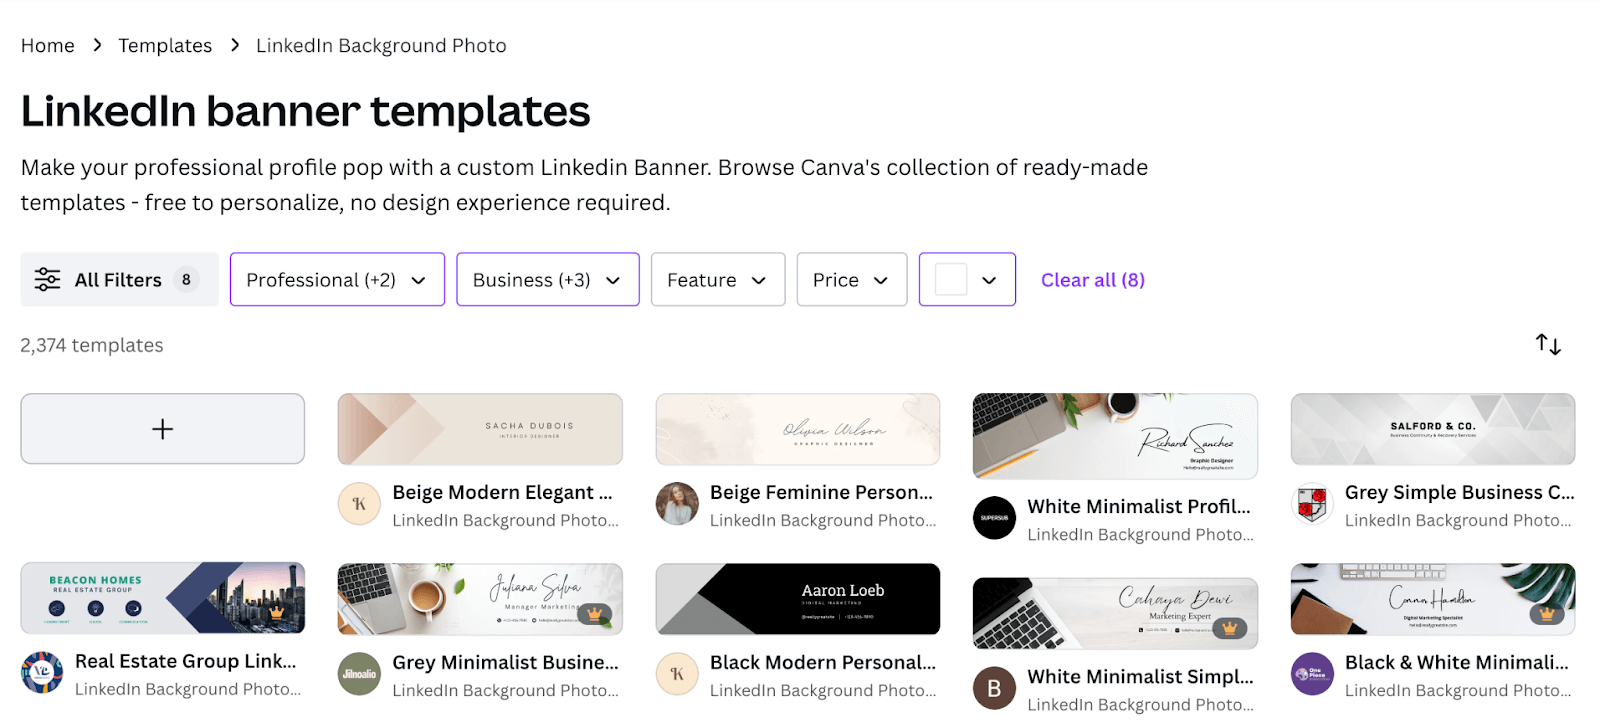
You can use different Canva templates and create cover photos in 10 minutes.
Here are some examples you can use for yourself:
Step 3: Write a Concise Headline
What are the questions that run through your head when you read the headlines of LinkedIn profiles?
I wonder how that person can help me and why I should follow them.
The headline is the place where you should answer these and similar questions.
In short, say what you do and how you can help people very concisely.
Here’s the checklist to help you on that path:
✅ Is my headline short?
✅ Does it clearly say what my expertise is?
✅ Did I say who and how I can help?
✅ Is it grammatically correct?
✅ Have I used keywords relevant to my industry?
✅ Does it exceed 220 characters?
✅ Does my headline have a value proposition(Why people would follow me)?
Optimizing your LinkedIn headline and using the relevant keywords for your industry will help you pop up higher in the search results, driving more visitors to your profile.
Here’s the template that you can use that is proven to perform well:
“I do X for Y without Z”
For example: “I create content for businesses and founders without taking more than 10 minutes of your time.”
Or another one:
“I'm bringing 10 leads per month for scaleups without automating.”
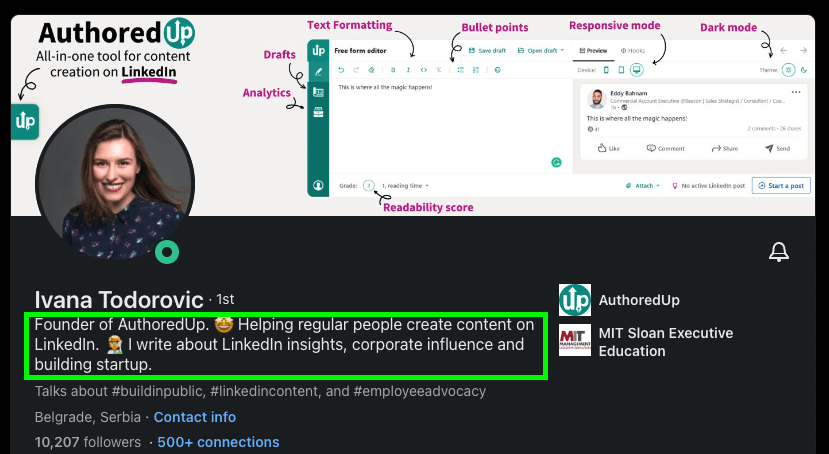
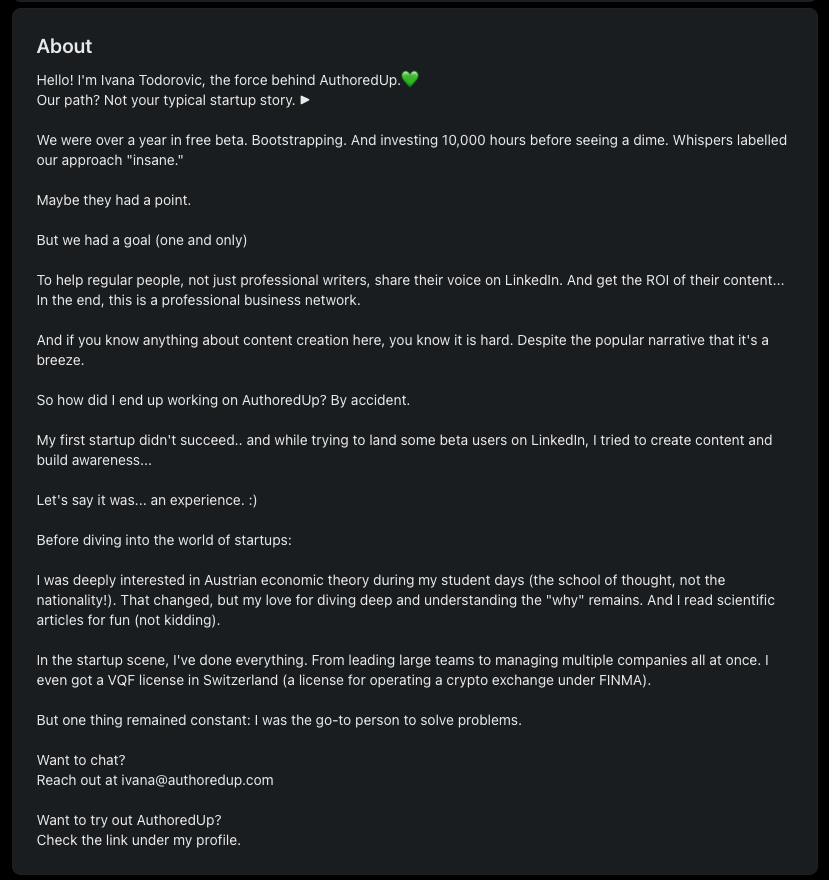
Step 4: Craft Informative Summary ("About me" Section)
The Summary section is not a place where you just need to list your skills and work experience, as most people do.
Tell a story about yourself, don't be afraid to show your personality, and let your voice shine through.
Note: Keep in mind that words that are in the summary section should be your keywords related to the industry you write about.
Keep it informative and easy to read while also showing your unique qualities.
Remember, this is your chance to convince potential employers or customers to work with you.
It is a good idea to use CTA’s and engage with people who are viewing your profile.
For example, let them know they can contact you if they think that you are a good match.
Here’s an example of it:
Ensure to check these points to improve your About section:
✅ Does it include an explanation of what I have to offer?
✅ Have I added contact information?
✅ Is it easy to read and scan through?
✅ Have I incorporated my career story?
✅ Have I included results that I achieved?
✅ Did I use 2000 characters?
✅ Did I manage to craft a unique story?
Pro tip: With our FREE LinkedIn "About me" tool you can easily create your description and see how it will look like in reality.
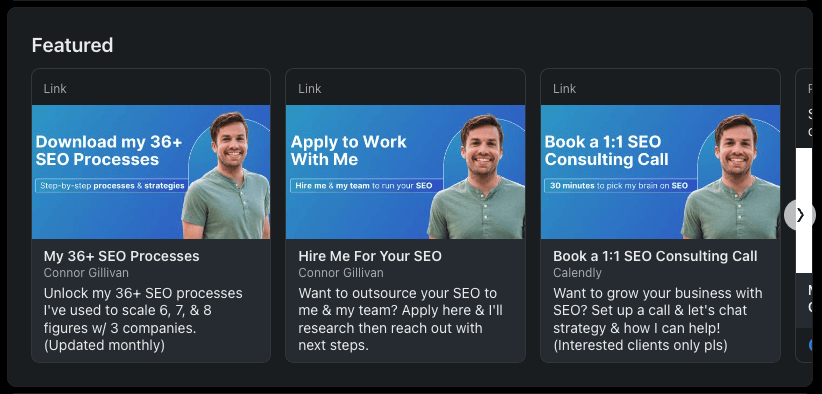
Step 5: Show Examples Of Your Work In The Featured Section
The LinkedIn Featured section is a part of your LinkedIn profile that allows you to highlight specific content that you want your visitors to see once they enter your LinkedIn profile.
The Featured section on LinkedIn appears at the top of your profile page, just below your profile picture and headline.
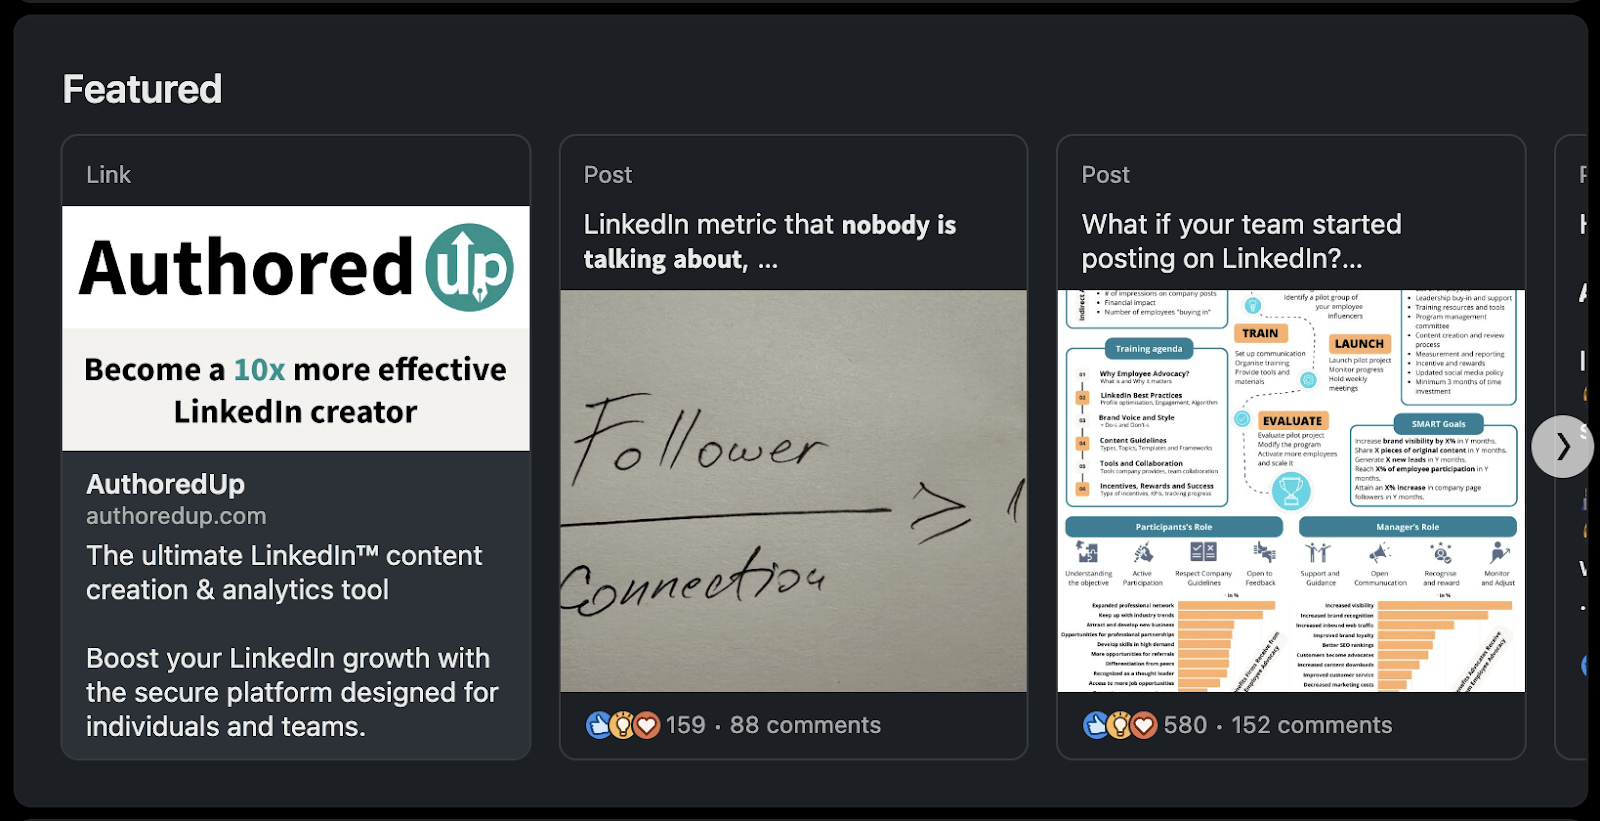
It showcases your expertise, enabling you to demonstrate your value proposition to potential clients and prospects.
If created well, the LinkedIn Featured section can help you increase your brand awareness, build trust among your connections, and generate qualified leads.
Here's how to add a featured section to your profile in a few steps:
Step 1. Click on the “Add profile section” within your LinkedIn profile and navigate to the "Recommended section."
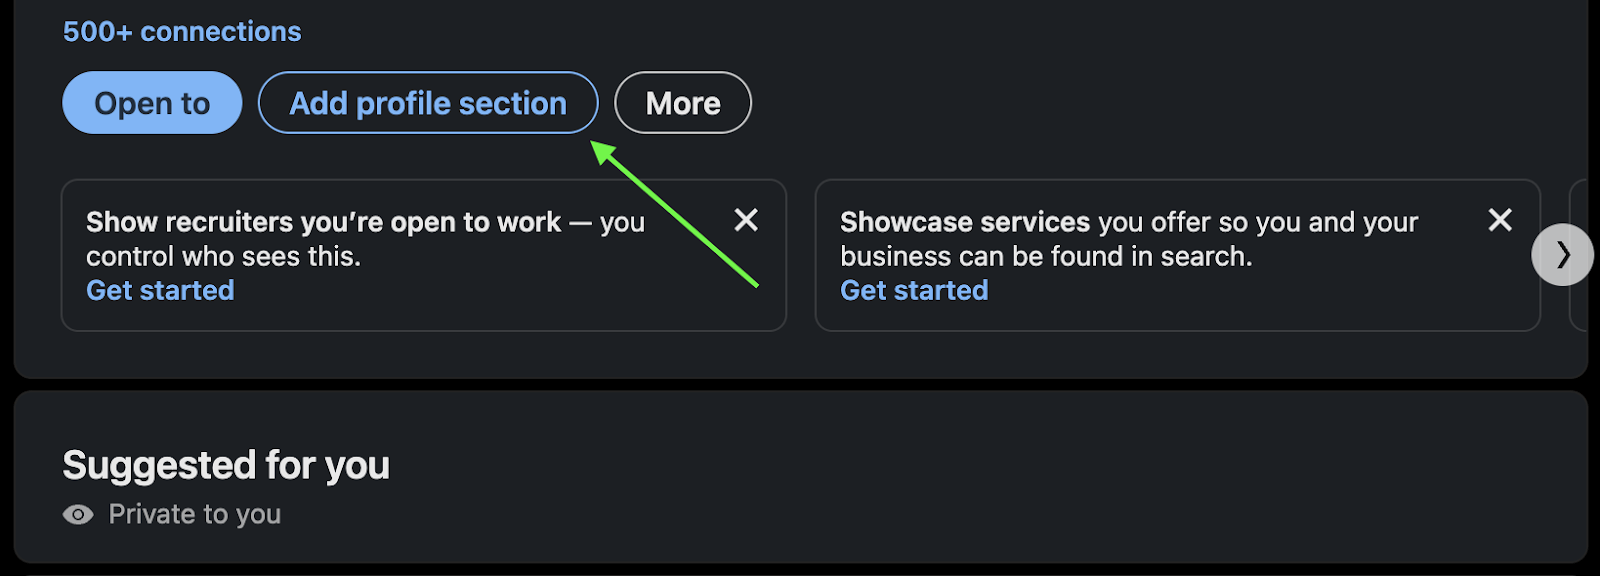
Step 2. Click on the “Add Featured” button, then "+" and choose the type of section you want to include.
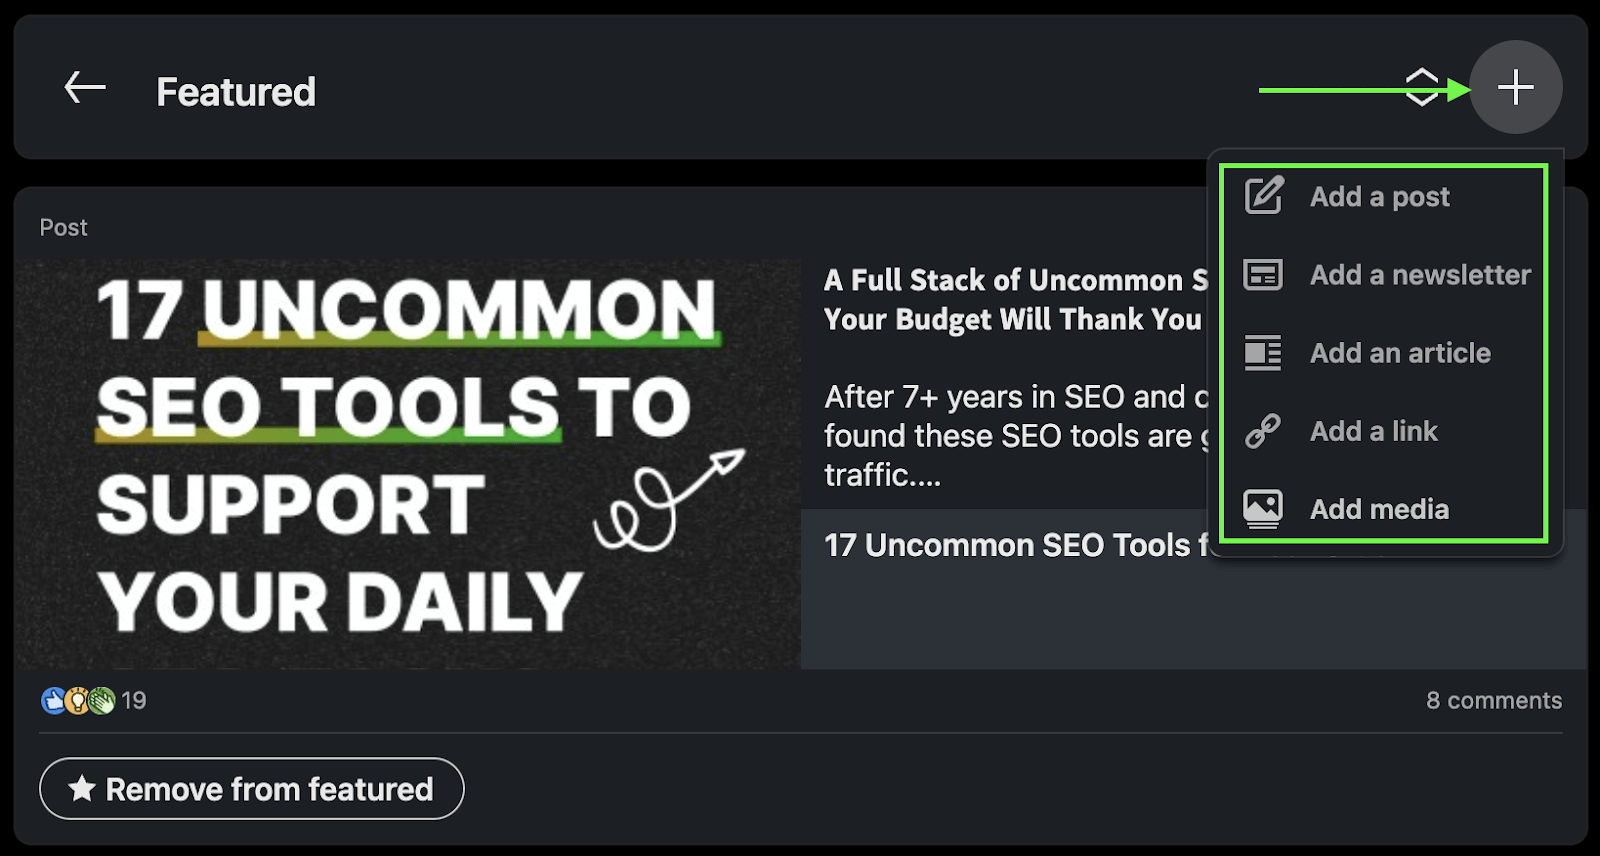
You can choose between different types of content to include within the featured section, such as Posts, Newsletters, Articles, Links, or Media.
It is a place where you should put the post that you want anyone who enters your profile to check.
Note: It is a good idea to include a link to your website to single out an article you are really proud of, success stories, or offers page you have on your website.
For example:
Here is the list you can go through:
✅ Have I used at least one link to my website?
✅ Did I share at least one article or post?
✅ Did I include a project I'm really proud of?
Step 6: List Your Work Experiences
The experience section of your resume is something like your CV.
It shows visitors where you have worked or where you’re currently working.
Start with the most recent jobs and list them in reverse chronological order.
Briefly describe your duties and responsibilities to help visitors understand precisely what you’ve been or are currently working on.
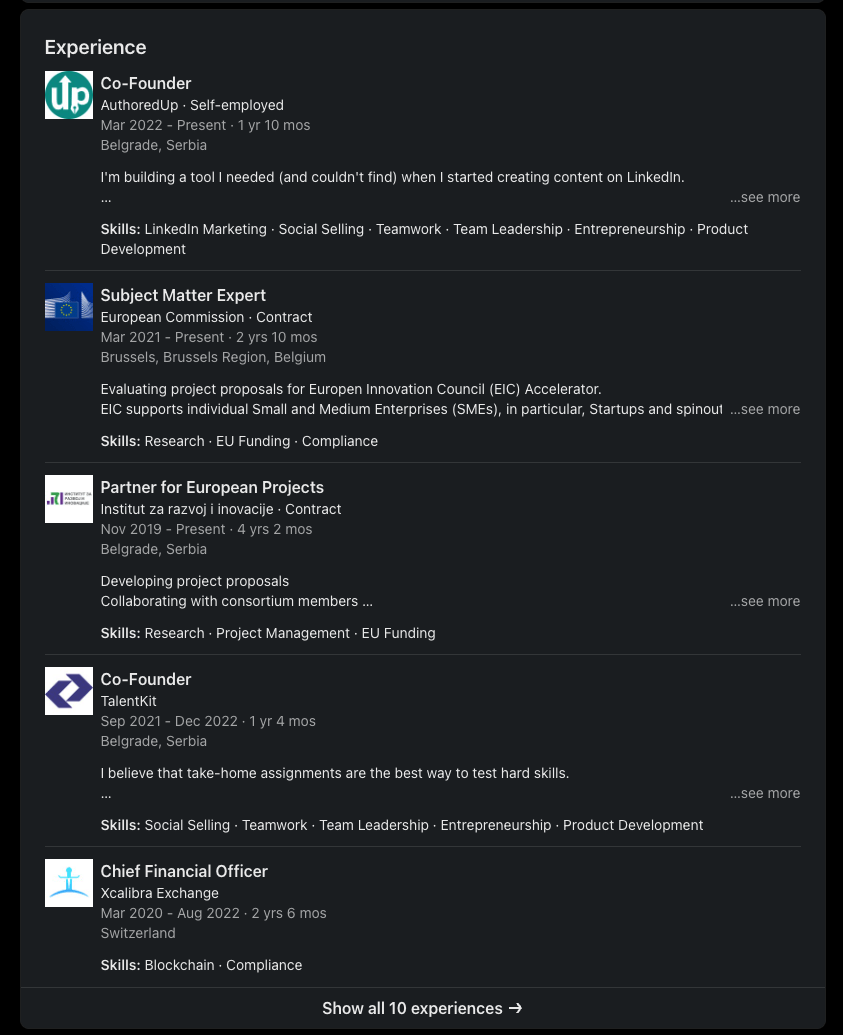
Tip: Use bullet points to keep this section structured and easy to read.
Additionally, mention any volunteer experiences you have had in this section.
Here’s the checklist to ensure you’ve created it right:
✅ Did I start from my current/most recent job?
✅ Did I use keywords relevant to my industry when describing the job duties?
✅ Is this section easy to read?
✅ Have I used bullet points?
✅Have I included details about each job, skills learned, responsibilities, etc.?
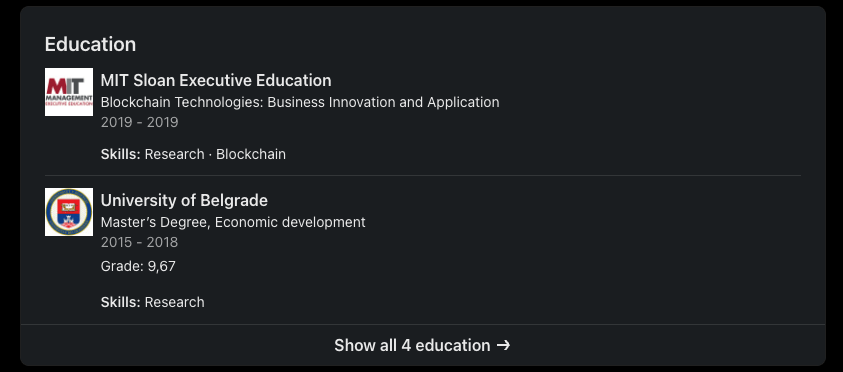
Step 7: Highlight Your Education
Here, you should show your academic achievements and your qualifications.
Don't forget to order everything from newest to oldest and to update this section regularly.
If you complete a course, you can add that information here to let others know more about the knowledge and experience you gained.
Here is the guide:
✅ Have I ordered my accomplishments in the correct order?
✅ Did I list completed courses?
✅ Have I inserted certificates?
Step 8: Fill Your LinkedIn Skills Section
Strategically populating your Skills section is very important to craft a compelling and highly discoverable LinkedIn profile.
You should treat this section as your personal SEO toolkit, incorporating keywords reflecting your professional expertise and industry.
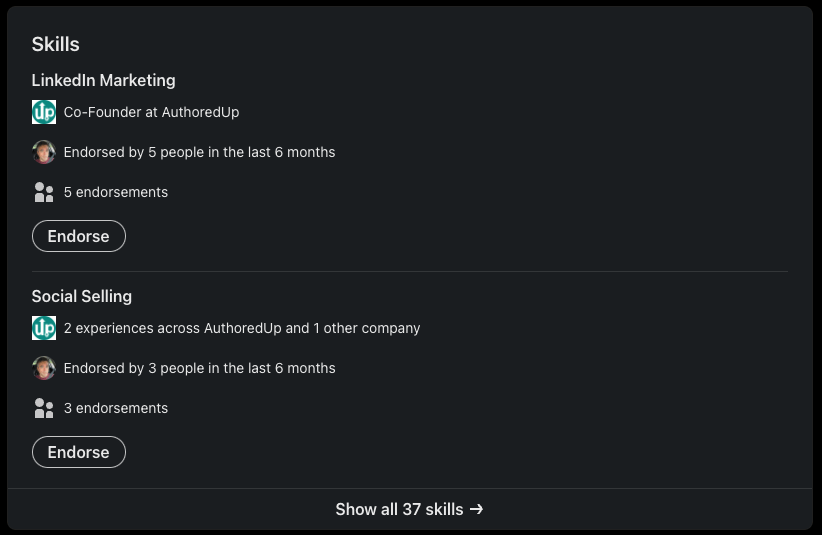
Note: Ensure that you include a diverse array of 25 relevant skills in your expertise that your potential clients or recruiters use when searching for potential partners or employees.
By doing so, you not only enhance your profile's visibility in search results but also demonstrate a well-rounded professional skill set.
Additionally, consider seamlessly integrating these chosen skills into your “About Me” section or at least some of them.
This reinforces your proficiency and aligns with LinkedIn's search algorithms, further boosting your profile's discoverability.
A thoughtful combination of hard and soft skills tailored to your unique strengths and industry demands ensures that your LinkedIn profile stands out.
Consequently, this will effectively communicate your professional value to potential employers, collaborators, and network connections.
Step 9: Add a Custom Button(for Premium Accounts Only)
If you have a Premium LinkedIn account, a ‘Custom Button’ is the functionality that allows you to put a custom button and drive your LinkedIn profile visitors to your preferred page.
It will show your LinkedIn profile visitors the best way to engage with you.
So how to include one?
Here are the steps:
Step 1. Navigate to “Settings and Privacy.”
Step 2. Under “Profile information,” select “Name, Location, and Industry”
Step 3. Choose one of the button options, enter the URL of the location, and hit “Save.”
You can choose between the following button options:
- Visit my store
- Visit my website
- View my portfolio
- View my blog
- Book an appointment
Using this option on LinkedIn can be a great tactic for creators to help them build a business around their personal brand.
Note: Don’t forget that you need a Sales Navigator or Premium paid LinkedIn account to access the 'Premium Custom Button.’
Step 10: Request for Recommendations
LinkedIn offers a convenient menu in the Recommendations tab where you can contact your contacts and ask them for recommendations.
They serve as a testament to your professional capabilities and add a personal touch to your profile.
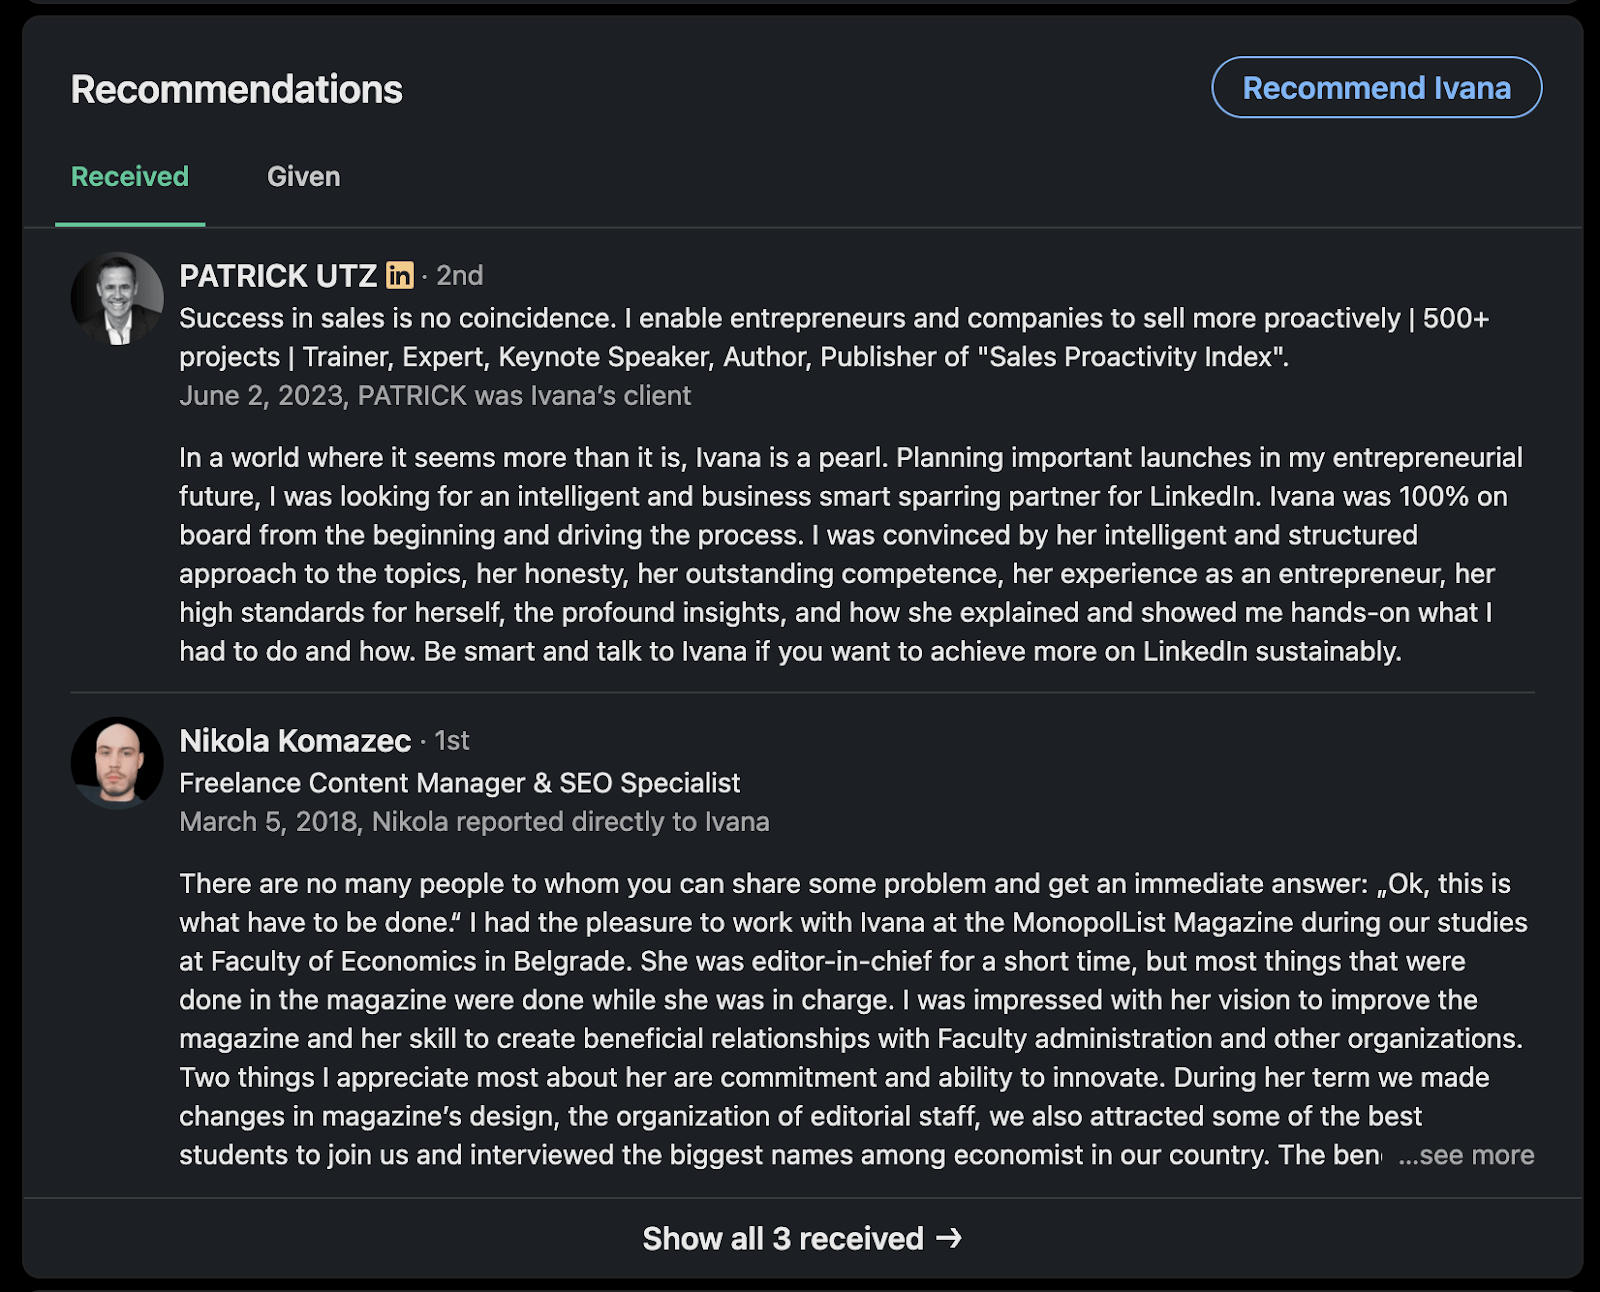
The people on LinkedIn who are actively seeking new clients are usually looking for recommendations from their connections.
So, how can you use this to your favor?
Here are some steps to follow:
- To optimize your LinkedIn profile comprehensively, ask for recommendations from your colleagues, supervisors, or clients who can speak to your skills and work ethic.
- Craft personalized and polite requests that highlight specific projects or experiences you shared, making it easier for your connections to provide meaningful endorsements.
- Aim for diverse recommendations covering various aspects of your professional life, showcasing your adaptability and proficiency in different scenarios.
These testimonials not only build credibility but also contribute to a well-rounded and authentic representation of your professional journey.
As you curate your profile, prioritize the cultivation of meaningful recommendations to establish an online reputation and leave a lasting impression on those who visit your LinkedIn profile.
Bonus: How to Get People to Visit Your Profile
You can’t work on improving your profile performance unless you get feedback from your profile visitors.
The number of them visiting your profile and the percentage converting in terms of sending you a connection request, DM-ing you, or even converting into leads or customers will tell you a lot about your profile performance.
But for that, you need to work on expanding your network to test your profile's performance.
Here are the three quickest ways to expand your network on LinkedIn:
1. Post Regularly - This is an effective way to expand your network and showcase your knowledge and expertise.
It's true that it's crucial to get noticed by potential clients or employers, but anyone who gets intrigued by your posts will want to know more about you.
It not only helps you increase the number of users that will come to your profile organically, but it also helps you appear higher in LinkedIn and Sales Navigator search results.
The top people that appear here are the ones that are most active on LinkedIn.
That's why all the previous steps are equally important.
💡Pro Tip
AuthoredUp can help you create high-quality and unique content that draws your audience's attention.
With its Text Editor, you can use different formats, fonts, emojis, and bullet points to improve your posts.
And what’s great is that its Preview feature lets you see how your post will look on different devices before posting it.

2. Follow The Relevant People - Follow people who publish educational content related to your field of interest. They will help you expand your knowledge and expand your network at the same time.
3. Engage with Other LinkedIn Posts - Take a few minutes a day to leave comments on other people's posts that your audience engages with. Doing so lets you discover interesting individuals and catch someone's attention.
Here is the checklist to help you:
✅ Have I followed any new people or companies this week?
✅ Do I share posts or articles at least twice per week?
✅ Did I engage /comment on any posts this week?
📍Bonus Tip
Yes, you should follow new people and companies frequently, but don’t go nuts about it.
Here’s some guidance you can start with and then increase as your profile grows:
- Send 15-20 connection requests per day: Connect with people you already know, such as friends, family, and coworkers.
- Comment on 10-15 posts: Comment on different posts on different profiles, and make sure those comments are valuable and not spammy.
- Send 5 messages per day: Reach out to people you've lost touch with or haven't spoken to in a long time. Send them a LinkedIn message about the pause in your relationship, and interact with their content. You can also send a personalized message to strangers or acquaintances and explain why you two should connect.
To Wrap Up
A compelling LinkedIn profile is your chance to show how serious you are in building your personal brand and business.
It's not something that happens overnight.
You need to put in a certain amount of work and effort to make concrete progress.
By optimizing and building your profile properly and consistently, there’s no doubt the reward for your effort will come.
But wouldn't it be great if you had a tool that could help you analyze your strategies, measure your growth, and help you with content creation when you get stuck?
Well, that's exactly what we have for you.
Look no further than AuthoredUp!
AuthoredUp - All-In-One-Tool for LinkedIn Content Creation
In addition to the Text Editor and Preview Feature, this tool offers you a wide range of valuable assets, such as:
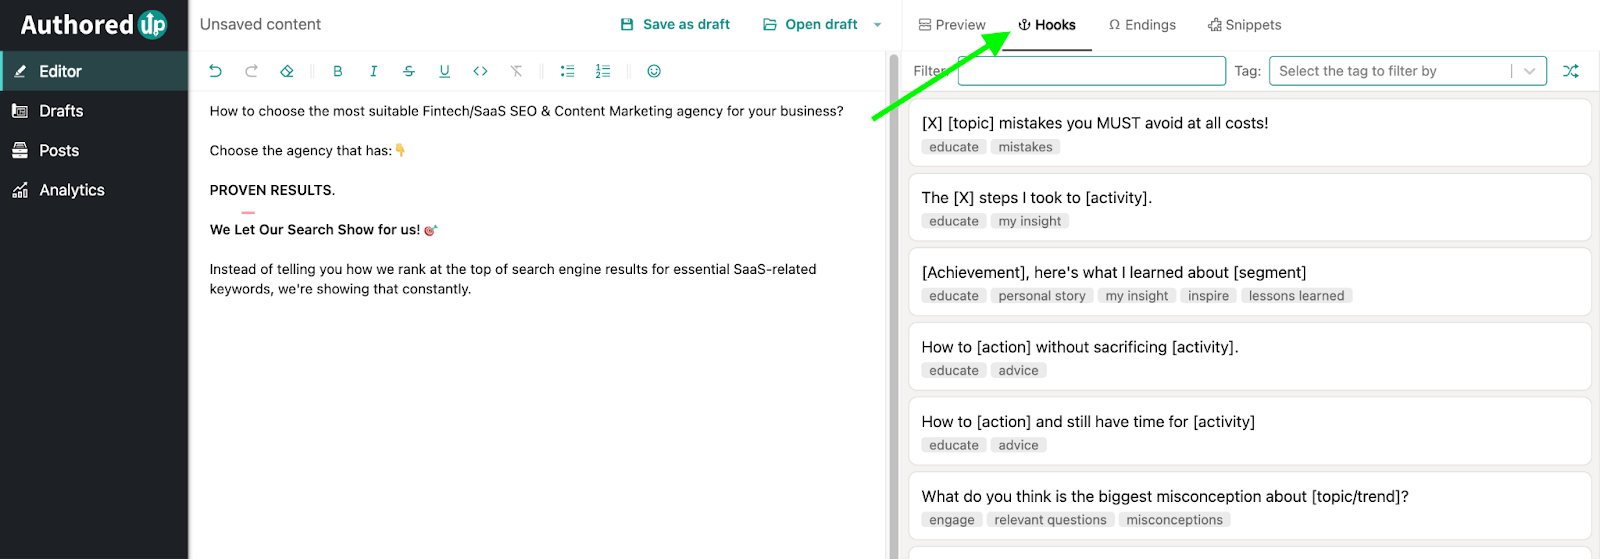
🖊️ Content Library: Apart from text editing, you can also use Hooks, Snippets, and CTA's. Whenever you find yourself in a situation where you don't know how to start or end a post, use the hooks and CTA's library to make your post better.
🔎Analytics: Allows you to analyze the performance of your posts down to the smallest detail. This feature includes:
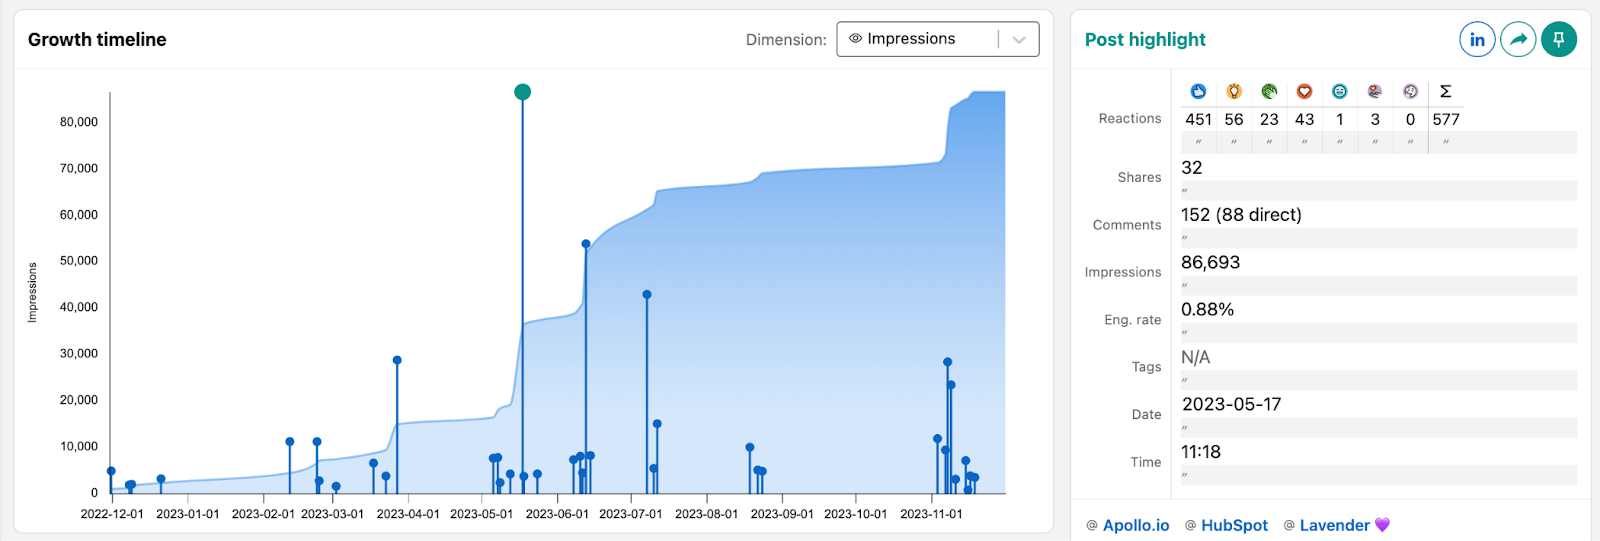
✨Growth Timeline - In addition to the timeline itself, you can see the performance of a specific post with detailed post stats.
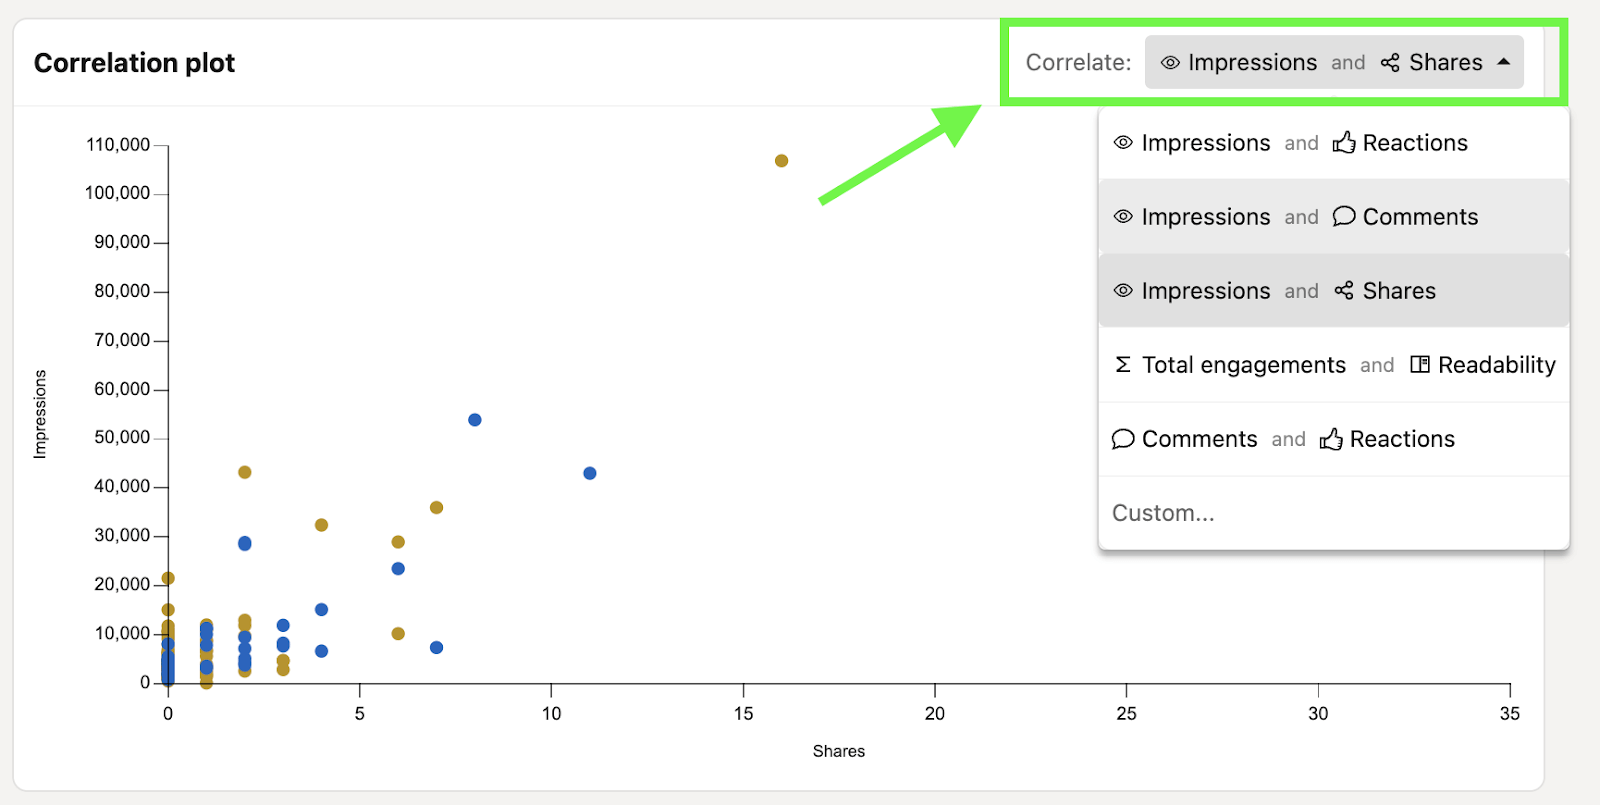
✨Correlation Plot - This is the analysis of two dimensions. For example, you can correlate impressions and shares.
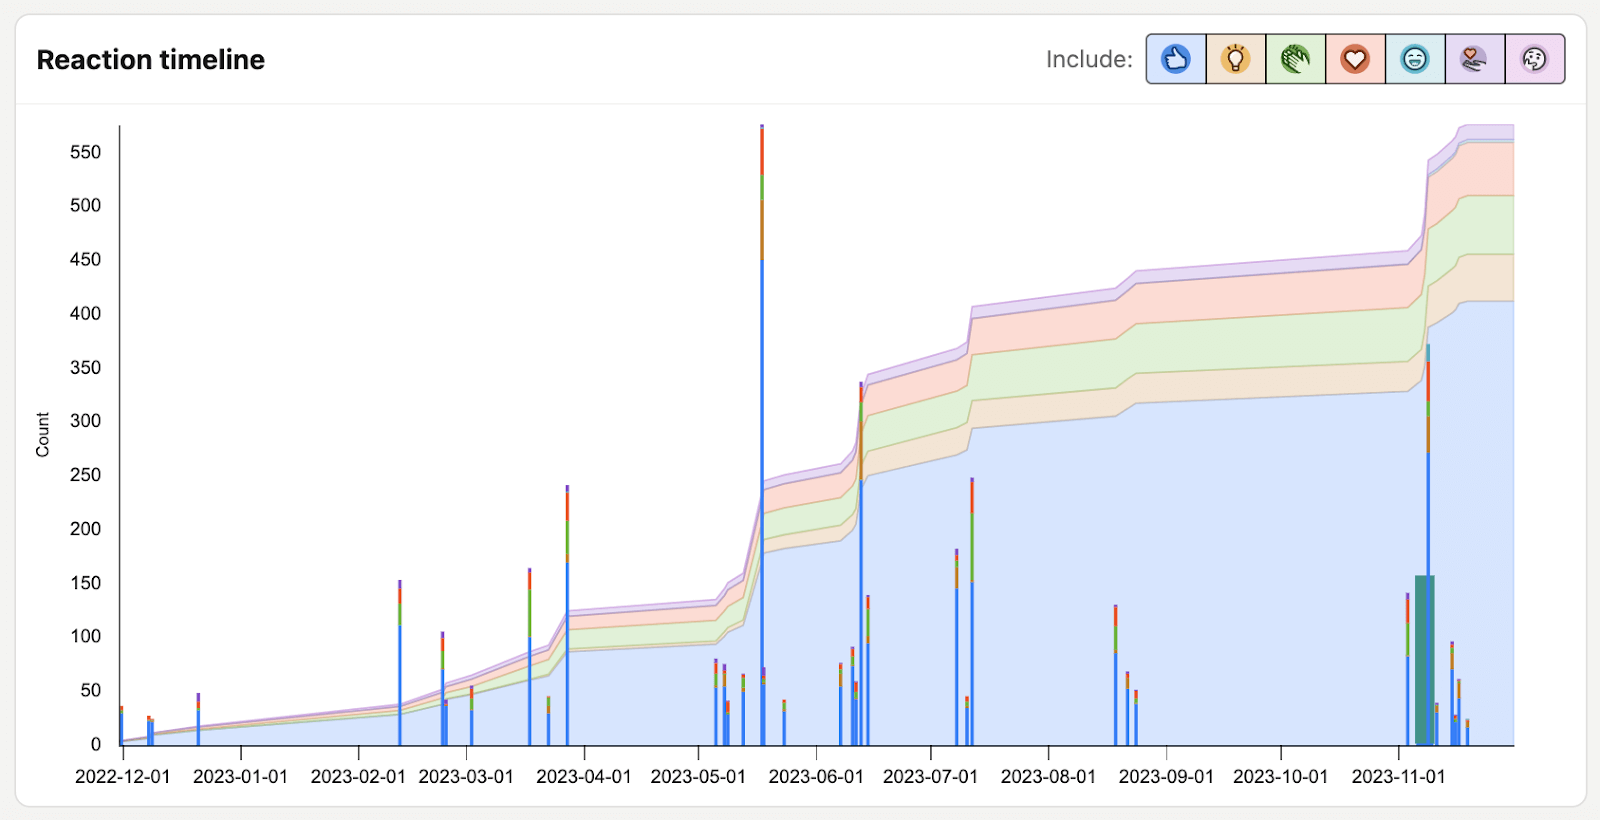
✨Reaction Timeline - See what reactions you get to your posts, depending on your post types.
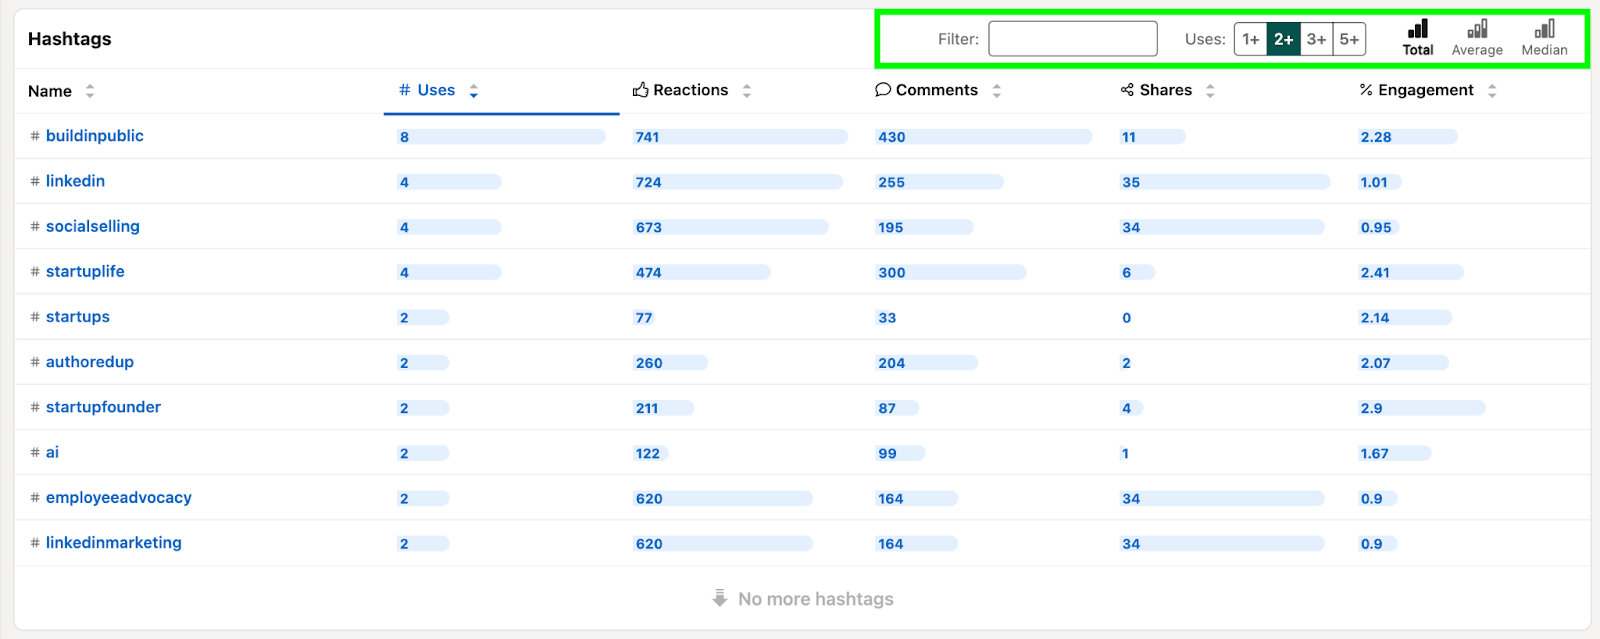
✨Hashtag Analysis - Check how the hashtags you use in your posts work for you.
✨Post Type Analysis - This analysis tells you what post type performs best on your profile so you can align your strategy accordingly.
🧠Drafts Hub: If you come across an idea for a post while aimlessly scrolling, this feature helps you create a draft and save the idea for a later post.

AuthoredUp is easy to use and can help you create a recognizable profile full of memorable posts your audience loves consuming.
So why not give it a try?
Create an account today and start making compelling LinkedIn posts effortlessly!